Loading
")
2026/06/27
AI video camera movements: how to control the shot (2026)
Push in, pull out, pan, orbit, crane — the camera-movement vocabulary that turns a shaky AI clip into a cinematic one, with copy-paste prompts for each move.
The thing that separates amateur AI video from cinematic AI video
Most people write an image-to-video prompt like "make it move." The AI then guesses, and the guess is usually a slow drift that looks like the floor is sliding. The clip feels off and nobody can say why.
The why is almost always the camera. In real filmmaking, the camera move is a deliberate choice — a slow push-in builds tension, a pull-out reveals context, an orbit shows off a subject. AI video models understand this vocabulary, but only if you actually use it. Once you name the move, the output stops drifting and starts looking intentional.
This guide is the camera-movement cheat sheet. Each move comes with what it does, when to use it, and a prompt you can paste straight into the Image to Video workspace. If you want the same idea applied to one specific style, the Photo to Cinematic Video page is built around these moves as presets.
The eight camera moves that actually work
You do not need film-school depth. Eight moves cover almost everything an image-to-video model can do reliably.
| Move | What the camera does | What it's good for |
|---|---|---|
| Push in (dolly in) | Moves physically toward the subject | Building focus, emotional close-ups, product reveals |
| Pull out (dolly out) | Moves away from the subject | Revealing context, "here's the whole scene" endings |
| Pan | Pivots left or right from a fixed spot | Scanning a landscape, following a line of subjects |
| Tilt | Pivots up or down from a fixed spot | Revealing height — buildings, waterfalls, full-body |
| Orbit (arc) | Circles around the subject | Showing a product or person from multiple angles |
| Crane (boom) | Rises or lowers vertically | Grand reveals, dropping into a scene, lifting away |
| Tracking (follow) | Moves alongside a moving subject | Walking shots, a car, a pet running |
| Static (locked-off) | Holds still while the subject moves | Portraits, talking shots, subtle living-photo motion |
A common confusion: zoom is not the same as push-in. A zoom changes the lens and flattens the image; a push-in physically moves the camera and keeps the parallax, so it feels three-dimensional. For most clips, ask for a push-in, not a zoom — it looks far more cinematic.
Copy-paste prompts for each move
These are written to work across the models on the platform. Keep them short and concrete. The bracketed part is the only thing you change per photo.
Push in
Slow camera push-in toward [the subject], steady dolly motion, preserve proportions, cinematic shallow depth of field. 6 seconds.
Pull out
Slow camera pull-out from [the subject] to reveal the surrounding scene, smooth dolly back, stable horizon. 8 seconds.
Pan
Slow camera pan from left to right across [the landscape], steady motion, no warping at the edges. 6 seconds.
Tilt
Slow camera tilt up from the base to the top of [the building], reveal full height, keep vertical lines straight. 6 seconds.
Orbit
Smooth camera orbit around [the product], 90-degree arc, studio lighting, keep the subject centered and sharp. 8 seconds.
Crane
Slow crane shot rising above [the scene], smooth vertical lift, wide reveal at the top. 8 seconds.
Tracking
Tracking shot following [the subject] from the side, camera moves at the same speed, motion-blurred background. 6 seconds.
Static living photo
Locked-off camera, no camera movement. Subtle motion only: [gentle breathing, slow blink, hair moving in a light breeze]. 5 seconds.
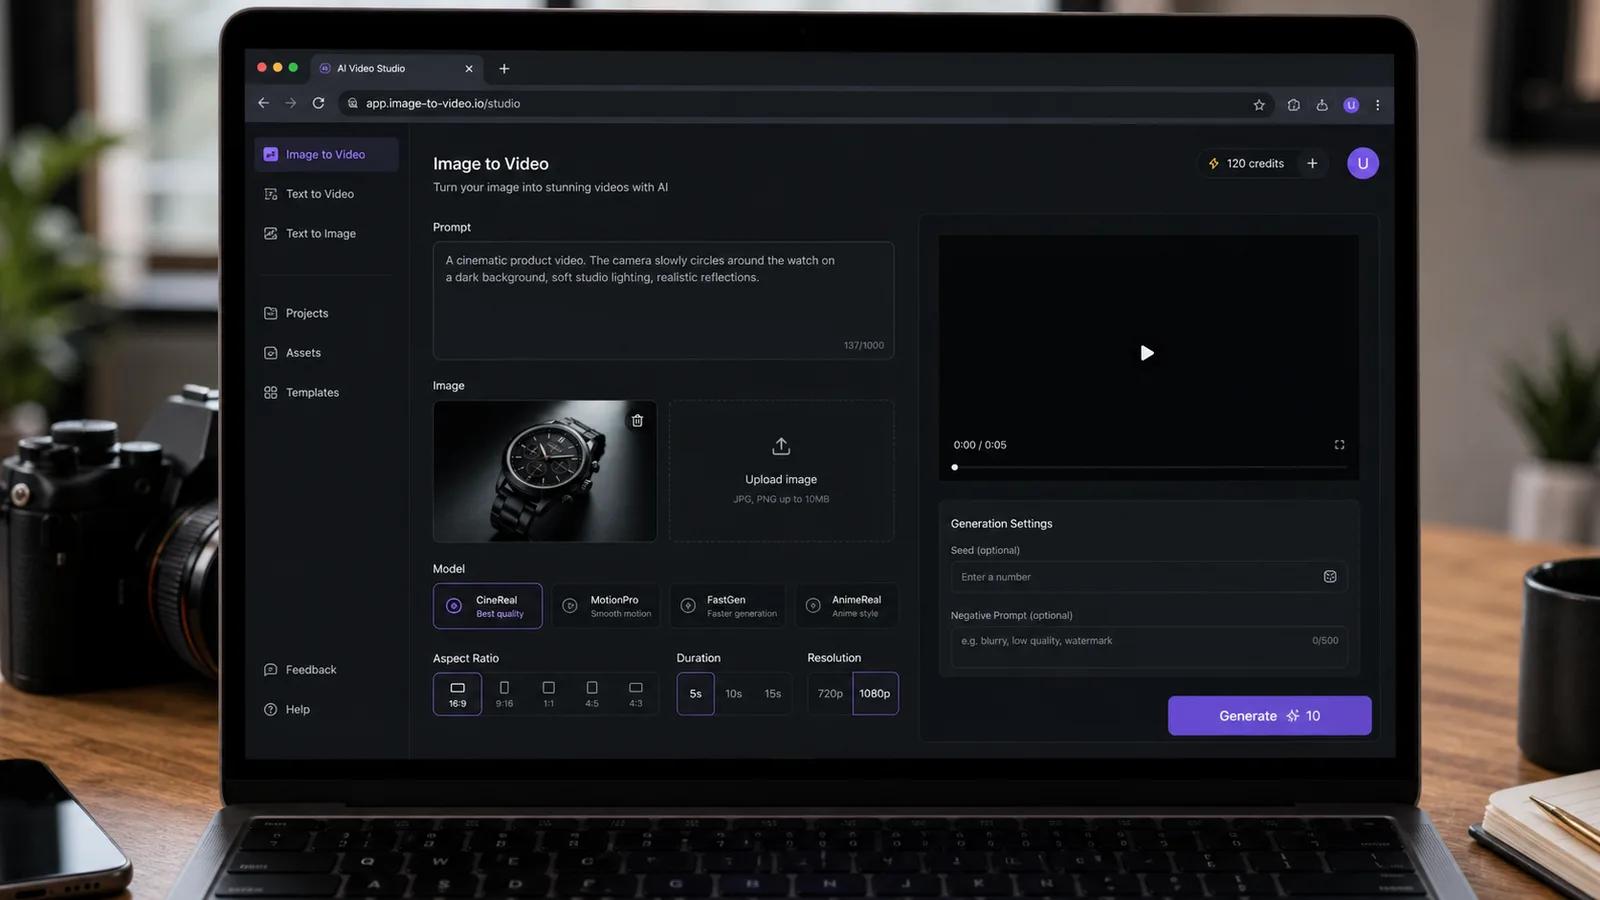
You write the move in the prompt and pick the model in the same panel — both live in the upload workspace, so there is nothing to install.
Which move suits which photo
Matching the move to the photo matters more than the exact wording. A few reliable pairings:
| Photo | Best camera move | Why |
|---|---|---|
| Portrait / face | Static or slow push-in | Movement should come from the person, not the camera |
| Landscape / wide vista | Pan or pull-out | Wide space gives the camera room to travel believably |
| Product on a table | Orbit or push-in | Shows form and finish without distorting the object |
| Tall subject (building, waterfall) | Tilt or crane | Vertical move matches the vertical subject |
| Street / travel scene | Tracking or slow pan | Reads like a moving observer in the scene |
| Old family photo | Static living photo | Keep it gentle — big camera moves break the illusion |
Three controls that make any move look better
Once the move is right, three small additions separate "fine" from "cinematic."
- Speed. Almost always say slow. Fast camera moves are where AI introduces warping and smearing. A slow, steady move hides the model's weak points and reads as expensive.
- A preserve clause. Add
preserve proportions and geometry(orkeep facial features consistent). This stops the AI from melting straight lines and faces during the move. - One move per clip. Do not ask for a push-in and an orbit and a tilt in one generation. Multi-move prompts are the number-one cause of janky output. Generate separate clips and cut them together.
Not every model moves the camera equally
Camera control is one of the biggest differences between models. If a move keeps coming out wrong, switching models often fixes it faster than rewriting the prompt.
- Runway Gen-4 — the strongest, most controllable camera motion. Reach for it when the move is the whole point of the shot.
- Seedance 2 — excellent natural camera travel for landscapes and establishing shots.
- Kling 3 — best when a person is in frame; keeps faces stable even during a push-in.
- Kling 2.5 Turbo — fast iterations when you are testing which move works before committing.
The full breakdown is in the Kling vs Runway vs Hailuo vs Veo comparison, and you can compare any two side by side on the model comparison page.
Common mistakes that ruin a camera move
- Asking for a zoom when you mean a push-in. Zooms flatten; push-ins feel dimensional.
- No speed word. Unspecified speed defaults to "too fast" and brings warping with it.
- Stacking moves. One move per clip. Always.
- Big moves on tight spaces. A long dolly through a small room or a close portrait has nowhere to go and starts inventing geometry.
- Ignoring the edges. Pans and tilts warp first at the frame edges — add
no warping at the edgesand keep important detail out of the corners.
A copy-paste prompt template
Use this skeleton for any photo instead of writing prose each time:
[Camera move]: Slow push-in / pull-out / pan / tilt / orbit / crane / tracking
[Subject]: what the move centers on
[Speed]: slow, steady
[Preserve]: preserve proportions and geometry, keep faces consistent
[Mood / light]: cinematic, soft natural light
[Length]: 5–8 seconds
Filled in: Slow orbit around the ceramic coffee mug, steady motion, preserve proportions and geometry, soft studio light, cinematic. 8 seconds.
Frequently asked questions
What's the difference between a zoom and a push-in? A zoom changes focal length and flattens the image. A push-in physically moves the camera forward and preserves depth, so it looks three-dimensional and far more cinematic. Prefer push-in.
Can I combine two camera moves in one clip? You can ask, but the result usually breaks down. Generate one move per clip and edit them together — it is faster and the output is cleaner.
Why does my camera move look shaky or warped? Almost always missing a slow instruction, or asking for too big a move. Slow it down, add a preserve clause, and keep important detail away from the frame edges.
Which model has the best camera control? Runway Gen-4 for pure camera motion, Seedance 2 for landscape travel, Kling 3 when a face is in the shot. Test on the same photo and keep the best.
Do I need to write a prompt at all? For a specific camera move, yes — that is the whole point of this guide. Left blank, the AI guesses, and the guess is usually a vague drift.
Try it on one photo
Pick a photo with a clear subject, open the Image to Video workspace, paste one move from above, and set the speed to slow. New accounts start free, no credit card — see pricing. The first cinematic clip usually takes one render.
See also
Author
Categories
The thing that separates amateur AI video from cinematic AI videoThe eight camera moves that actually workCopy-paste prompts for each moveWhich move suits which photoThree controls that make any move look betterNot every model moves the camera equallyCommon mistakes that ruin a camera moveA copy-paste prompt templateFrequently asked questionsTry it on one photoSee also
More Posts
: I Tested Both on 20 Images")
Kling 3 vs Runway Gen-4 (2026): I Tested Both on 20 Images
Real side-by-side test: faces, camera moves, speed, and cost. See which AI video model wins for your use case — and try both free, no credit card.
")
How to Turn a Photo Into a TikTok Video With AI (2026 Step-by-Step)
Turn one still photo into a vertical 9:16 TikTok or Reels clip with AI. A real screenshot walkthrough of the ImageToVideoAI workspace, plus prompts and posting tips.

Animate old photos & make AI hug videos: 2026 guide
A current, screenshot-based guide to animating old photos and creating AI hug videos with ImageToVideoAI's real workspace.
Newsletter
Join the community
Subscribe to our newsletter for the latest news and updates